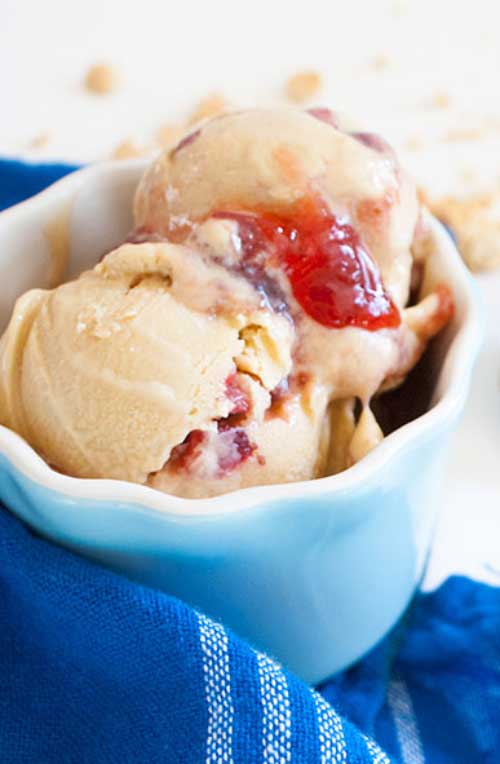
PB&J isn’t just for kiddie sandwiches any more care of this Peanut Butter and Jelly Ice Cream recipe. I like to include fresh strawberries in the jam for that fresh-y burst.
Peanut Butter and Jelly Ice Cream
PB&J isn't just for kiddie sandwiches any more care of this Peanut Butter and Jelly Ice Cream recipe. I like to include fresh strawberries in the jam for that fresh-y burst.
Ingredients
For the ice cream:
- 2 cups heavy cream
- 1 cup whole milk
- 3/4 cups granulated sugar
- 8 large egg yolks, ready and waiting in a large bowl
- 1/2 cup peanut butter
For the jelly:
- about 1 cup strawberries
- 1/3 cup granulated sugar
- about 1/3 cup strawberry jam
Instructions
- First things first: In a medium pot go the milk, cream, and then (this is important), only about 2/3 of the sugar. You can be rough in your approximation. The reason I do it this way is because it doesn’t have to be exact. I just want to save some for the yolks. It all ends up in the same pot in the end. Set the remaining sugar aside for the moment.
- Dump in the peanut butter and boil that jazz over high heat. The peanut butter will be easier to stir up as the high heat melts it. Don’t walk away though. Pots with cream have a nasty tendency to boil over.
- Once the pot has boiled, pour the sugar into the bowl with the yolks. Not sooner, because sugar and yolks sitting together for too long makes for some dried out yolks.
- Now let’s “temper” the milk into the yolks. All while whisking, slooooowly stream the hot milk mixture into the yolks. We don’t want the shocking heat of the milk to scramble up the yolks.
- Return everything to the same pot, and over low-medium heat, thicken the mix. Stir the entire time with a wooden spoon or a heatproof spatula, especially concentrating on the bottom and edges of the pot, so the eggs don’t stick and burn. After about 5-10 minutes, the whole shebang will get thick enough to coat a spoon, where a drawn line will hold its shape. That’s when you know it’s done. Don’t dawdle here. The residual heat will keep everything still cooking, and there is still a chance of the eggs scrambling up.
- Pour everything through a fine-mesh strainer into a storage bowl or container. Since the mixture will be a little thick, you’ll likely have to coax it with a spatula through the mesh. This bowl can be refrigerated for at least 4 hours or overnight to cool and develop flavors. Though really, if you can cool this quickly over ice, you can spin it into ice cream right away.
- Meanwhile, let’s dice up 6 or 7 strawberries. Throw some sugar on those babes. Stir. Cover and refrigerate for at least 4 hours, but overnight is better. They’ll release more juice.
- The following day, pour the base into our favorite ice cream maker. Freeze according to the manufacturer’s instructions. Just like I don’t much follow times with an oven, I also don’t follow times with an ice cream maker. It depends on what kind of base you have, what temperature it was to begin with when you poured it in, etc. I let it go long enough to get a soft serve consistency. Don’t let it go till it’s very firm or you might “overspin”, where the mixture starts to separate. You will know this happened to you if you end up with a grainy textured ice cream.
- While that’s working, let’s get our strawberry add-in ready. Drain the strawberries out and save the juices. You can pour this over the ice cream! Stir the strawberries into the jam.
- When the ice cream base is ready, working quickly, throw on a couple of dollops of jam. Do a couple of swirls, almost pushing the jam into the ice cream. Dig into the bottom and try to dredge it to the top. Add another dollop or two and work it in to the naked areas. Make each stir deliberate and try to refrain from doing a lot of shallow stirs or you’ll just end up with a murky, stirred up, homogenous mix.
- Wrap this tightly with plastic wrap and freeze till it hardens, at least 4 hours, as I like to say.
Category Ice Cream
Recipe and Photo: Pastry Pal


